UR-50 Long Range LiDAR
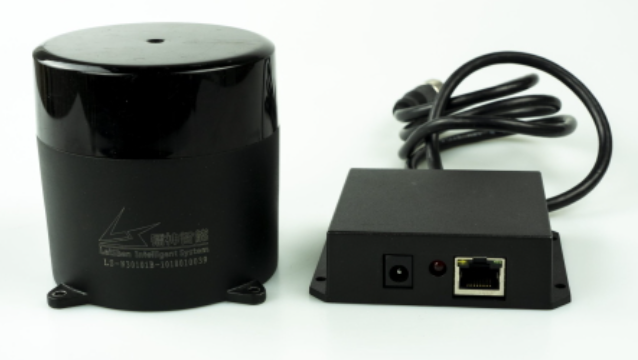
| Range | 50 m |
| Cabling | Ethernet + AMP Power Plug |
| Based on | LeiShen N301 |
| Input power voltage | 12V |
| Input power consumption | 6 W (500mA@12V) |
| Scan frequency | 20 Hz |
| Min detection distance | 0.05m |
| Max detection distance | 50m |
| Scan angle | 360 degree |
| Ranging method | TOF flight time ranging |
| SKU | LRL000001 |
When changing out sensors makes sure to disconnect the RED battery cable from the batteries and wait 2 minutes so high voltage and current are not linked with the main board!
This tutorial is intended for magni_robot branch: indigo-devel and ROS Kinetic.
Installation
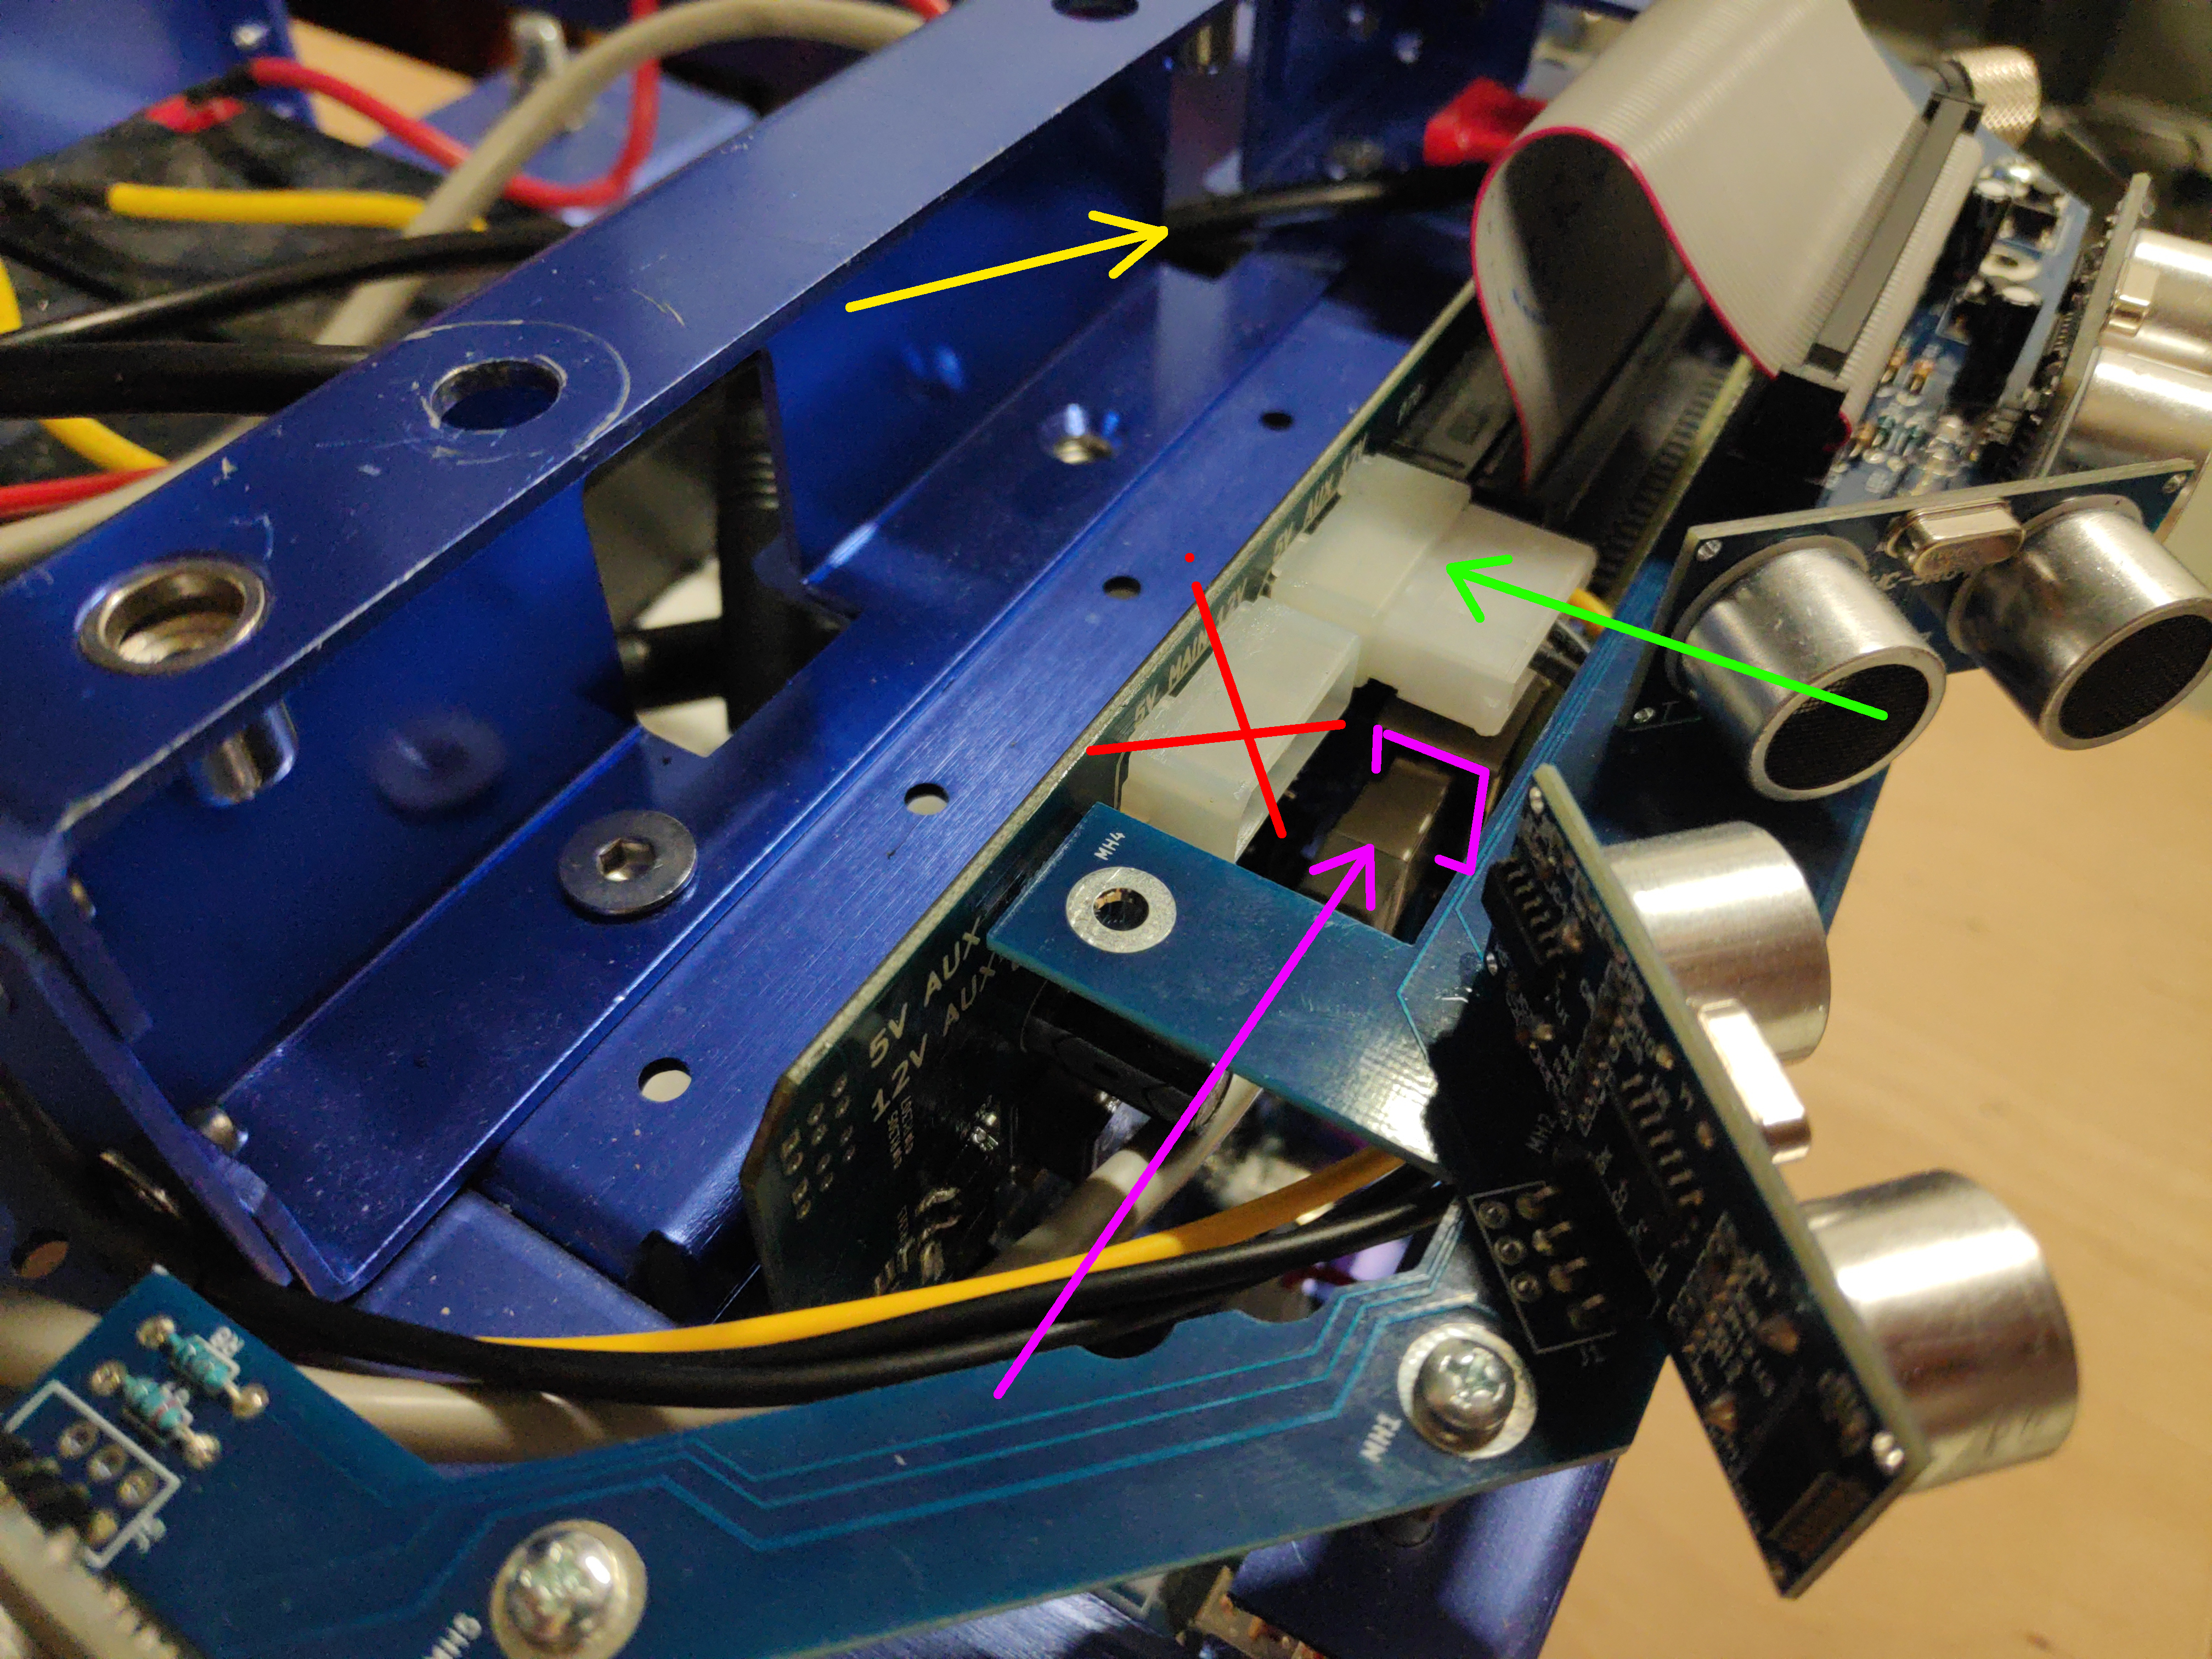
Connect the lidar lan cable into Raspberry Pi lan port and the power supply connector into the right molex connector on the MCB board:
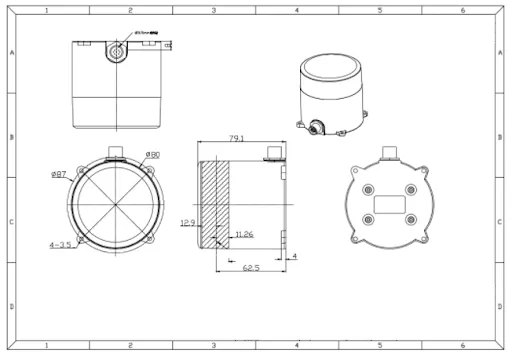
Using 4xM3 screws, the lidar can be mounted on the top plate that comes with Magni robot
Now the batteries can be reconnected and the robot powered on.
Default location
The default location of the lidar is on the top plate looking into the forward direction (lidar connector is turned backward). Top plate of newer robots comes ready with holes for lidar mounting. But some of the older versions don’t have those holes. In that case please either contact Ubiquity Robotics to supply you with a new top plate OR use double sided tape to mount the lidar. If you chose to mount the lidar with the double sided tape please make sure its 1.) turned exactly forward - a slight offset in angle can result in inaccurate localization and 2.) its center is EXACTLY the position shown on the picture.
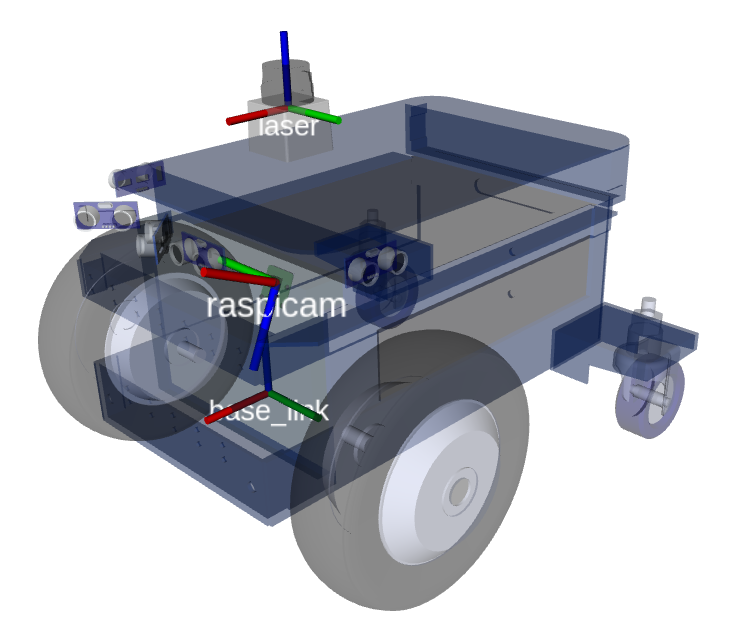
On the picture red, green, blue correspond to x, y and z axis. Lidar is the component that says ‘laser’ on the image (lidars are sometimes also called lasers)
Advanced: Changing LIDAR internal IP settings
Warning: IPs are changed from their defaults, it is highly likely nothing will work out of the box with Ubiquity Robotics products.
If buying a lidar from Ubiquity Robotics, the lidar will come pre-set with the IPs that were used in these tutorials:
- LIDAR IP: 192.168.42.222
- IP to which lidar is connected (workstation IP): 192.168.42.125
If you want to change those lidar-internal IPs here is a video about how to do that.
Additionally to whats shown on the video, make sure:
- First make sure you have WinPcap installed (sourced here or download from the internet)
- Follow the steps shown on the video to change the LIDAR IP, but a couple of notes:
- in the video PC IP is changed from 192.168.1.125 to 192.168.42.125. This was done because often external network is also on the subnet 192.168.1.xxx and this creates problems with the internet connection.
- in the video the IP is changed to 192.168.42.125 -> this is arbitrary and can be any IP
Setup to work with RaspberryPi
Network
The lidar should come pre-configured with static IP: 192.168.42.222 and only answering to requests coming from IP 192.168.42.125, so we need to configure that on the RPI.
A static interface needs to be set on RPIs lan port by editing the interfaces file
sudo nano /etc/network/interfaces
we need the eth0 interface to have a static address of 192.168.42.125/24:
auto eth0
iface eth0 inet static
address 192.168.42.125/24 #this IP may depend on your lidar settings
gateway 0.0.0.0
dns-nameservers 8.8.8.8
Compiling
cd ~/catkin_ws/src
git clone https://github.com/LS-Technical-Supporter/LS-LIDAR-N301ROS.git
cd ~/catkin_ws/
catkin_make
Running
cd ~/catkin_ws/
source devel/setup.bash
roslaunch lslidar_n301_decoder lslidar_n301_config.launch device_IP:=192.168.42.222
Default lidar extrinsics
The lidar position that is going to be loaded when robot starts up can be set in /etc/ubiquity/robot.yaml:
sudo nano /etc/ubiquity/robot.yaml
which should, among other things also contain:
lidar_installed: True
Example: Adding a custom lidar location
If the lidar is set in a different position, readjust its coordinates in the urdf files. Example:
<origin xyz="0 0.1 0.4" rpy="0 0 0"/> <!--change lidar pose here-->