Advanced Documentation
Intended for developers and power users.
Save locations
EZ-Map saves various files during its operation, with all of them being found in ~/.ros.
The created maps and their routes are saved as four files:
~/.ros/name.pgm(map occupancy grid image)~/.ros/name.yaml(map metadata)~/.ros/name_landmarks.yaml(locations of fiducial landmarks on the map)~/.ros/name_routes.json(routes defined on the map)
The web part also stores it’s settings config in ~/.ros/web_settings.cfg.
To move your data from robot to robot simply copy the files into the same directory on the new robot. The maps can be edited using an image editor that supports pgm files (for example Gimp on Linux), whereas the rest of the files can be edited using any text editor.
API Reference
The web app communicates with ROS backend nodes through a collection of services, all of type (ezmap_msgs/DoubleString):
map_save(save the current map, param: map name)map_delete(delete an existing saved map, param: map name)map_load(load an existing saved map, param: map name)-
map_list(return all map names and associated route data in JSON format) route_reverse(run route in reverse, param: route name)route_forward(run route forward, param: route name)route_stop(stop route, param: route name)
Information about the currently executing route can be found by looking at the following topics:
action_info(navigation info, type: String)route_status(current status of route, type: String)route_name(name of current route, type: String)
Note that the full API is only implemented in the full version and most of these services aren’t available in EZ-Map Lite.
Calling services through a Terminal
Some examples of calling the said services through an ssh terminal (or on a connected workstation) would look something as such:
rosservice call /ubiquityrobot/map_save  "data: 'map1'"
rosservice call /ubiquityrobot/map_load  "data: 'map1'"
rosservice call /ubiquityrobot/map_delete  "data: 'map1'"
rosservice call /ubiquityrobot/route_forward "data: 'test'"
rosservice call /ubiquityrobot/route_reverse "data: 'route2'"
rostopic echo /ubiquityrobot/action_info
rostopic echo /ubiquityrobot/route_status
rostopic echo /ubiquityrobot/route_name
Calling services with another ROS node
You can also call the aforementioned services with a C++ or Python node, you can find a detailed guide on that on the ROS tutorials wiki.
The service specific part should look something like the following (for Python):
from ezmap_web.srv import DoubleString

rospy.wait_for_service('map_save')
map_save_service = rospy.ServiceProxy('map_save', DoubleString)

map_save_service("mapname")
Multimaster
ROS 1 uses what’s known as a roscore, which is a centralized hub node that connects nodes between one another. This node is known as the “ros master”, and as there is typically only one of them (started by the robot itself at boot) it becomes a problem when multiple robots need to communicate between each other. This is where multimaster comes in.
By default the distribution is set up to create a ROS namespace for the robot (each topic will have the robot hostname prepended), which allows multiple robots to connect to a single workstation at the same time without topic collisions. To use multimaster effectively you’ll need to ssh into your robots and run sudo pifi set-hostname <robotname> to define each robot’s unique namespace.
When that is set up properly you should be able to subscribe to topics from other robots in any of your robots, or on a connected workstation with multimaster also installed.
For more detailed instructions on how to connect multiple robots please consult the readme in ~/catkin_ws/src/ezmap/README.md on the robot.
Plugin Overview
EZ-Map at its core consists of a system that loads custom plugins (which function as ROS packages), which in turn add the main functionality and allow for high customisability. In fact ezmap_core is the only required package for functional EZ-Map, the rest are just plugins.
Installation of new plugins on a typical setup only requires you to drop it into the ~catkin_ws/src folder and restart the robot (and follow any extra instructions in the ReadMe.md file).
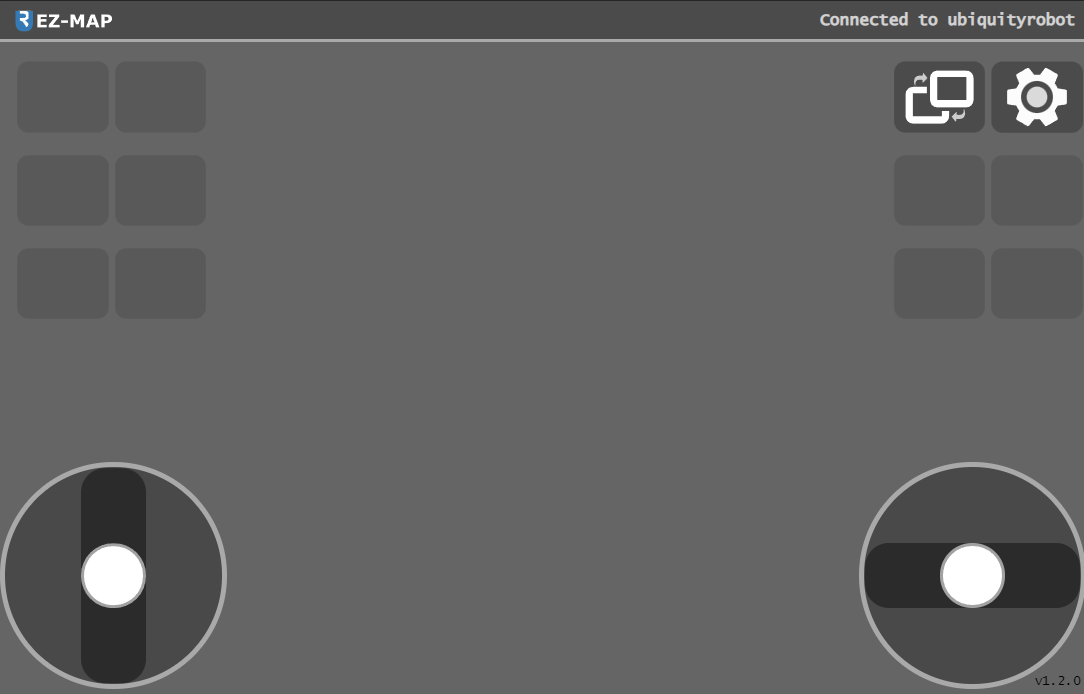
Without any plugins default you should only see the window switch (![]() ) and settings (
) and settings (![]() ) widgets:
) widgets:
Writing a Plugin
Plugins can be defined as regular ROS packages included in the same catkin workspace as ezmap_core, usually ~/catkin_ws/src.
They must also have an additional file named WEB_CFG to be loaded as shown below:
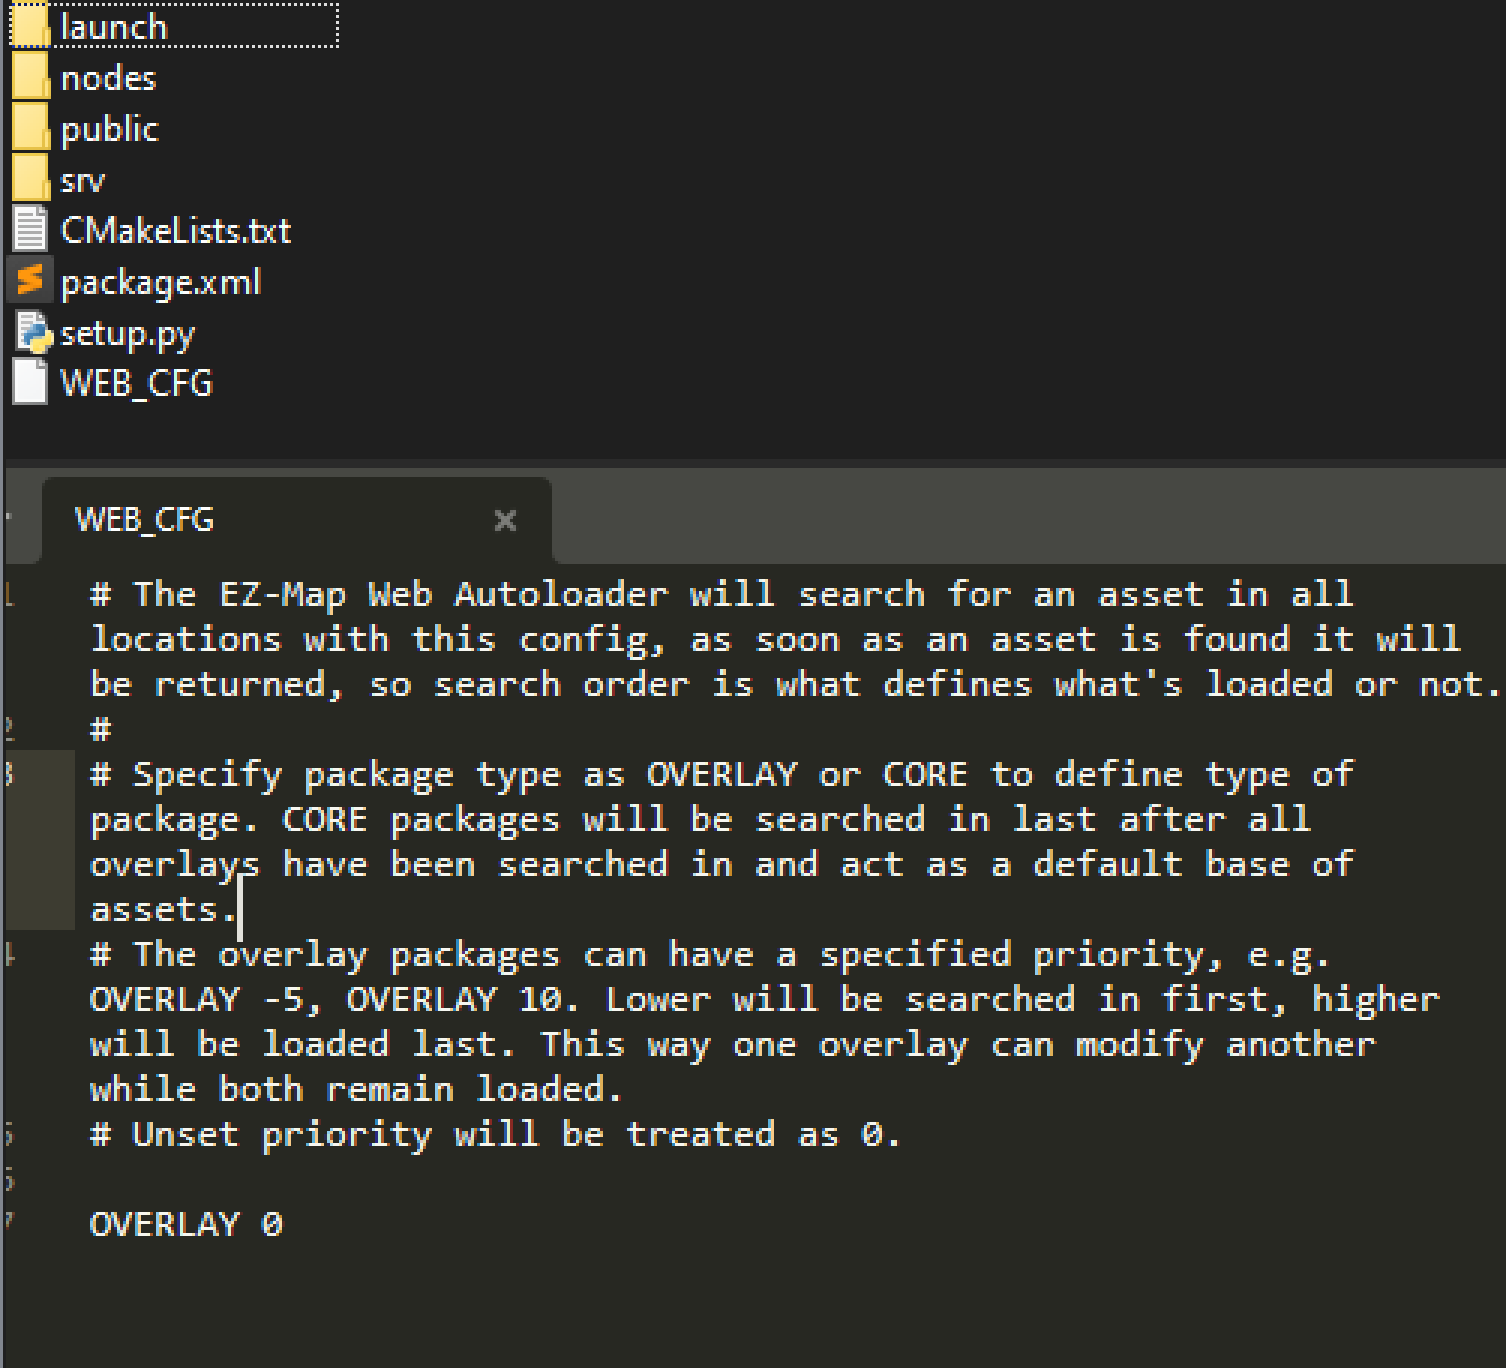
This file defines the load order for the package to ensure proper asset/code priority. The core packages are set up as CORE, whereas all plugins should be defined as an OVERLAY.
The code is separated into two main parts, the backend and frontend. The public folder will be automatically loaded and served by the web server, whereas you can write any ROS nodes to use as the backend as you would normally.
The convention is for each plugin to have a launch file named autostart.launch which can be included in the main bringup file in order to launch the entire plugin.
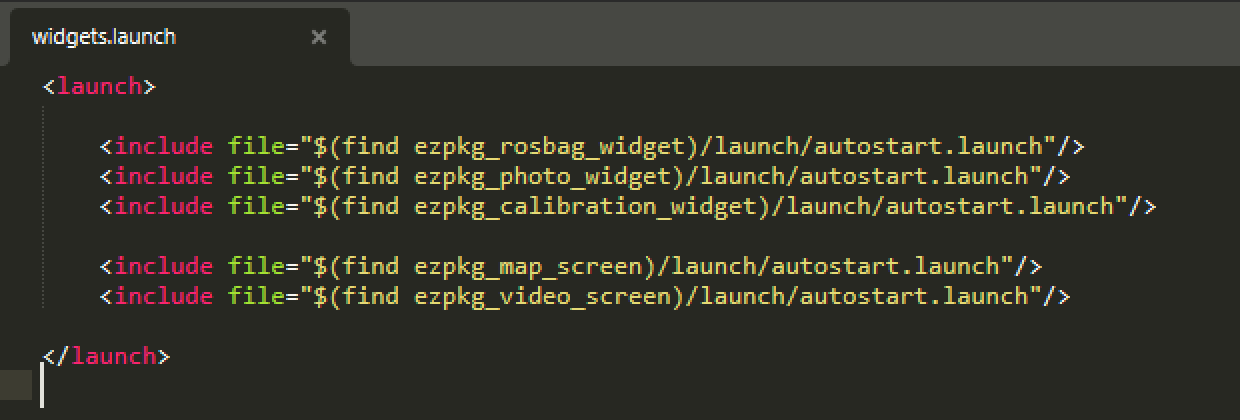
The packages already set up to be launched by default can be found in ezmap_bringup/launch/base.launch.
Web Frontend
So how does one actually hook into the existing codebase?
At the basic level what you’re doing is replacing files that are found in ezmap_core/ezmap_web/public/ and ezmap_core/ezpkg_views/public/. When a client requests an asset, say html_modal/modal_4.html the asset loader will try to find the file with the highest priority, which could be a plugin or the core ezmap_web package as a fallback. There is a long list of empty files named modal_X.html in the html_modal designed to be fetched by the client, so they can be replaced by plugins.
So how come multiple HTML files can be loaded as such? The autoloader handles a custom tag serverside called includehtml, which lets you include external html files. Example usage: <includehtml src="html_modal/modal_video.html"/> (root of file structure is the publicfolder). Usually not needed by plugins, but it can be used for organization.
For example the modal_map.html that’s usually replaced by the mapping package is defined like this in the plugin package:
<includehtml src="html_modal/map.html"/>
<includehtml src="html_modal/route.html"/>
<includehtml src="html_modal/actions.html"/>
<includehtml src="html_modal/global_triggers.html"/>

<script src="map_main.js"></script>

<script src="map_manager.js"></script>
<script src="map_manipulator.js"></script>
<script src="map_subscribers.js"></script>

<script src="map_actions.js"></script>
<script src="map_routes.js"></script>
<script src="map_globaltriggers.js"></script>
Views
Plugins can add content in 3 main areas: Views, Buttons and Modal windows.
Content that takes up the entire screen and can be swapped between by pressing ![]() .
.
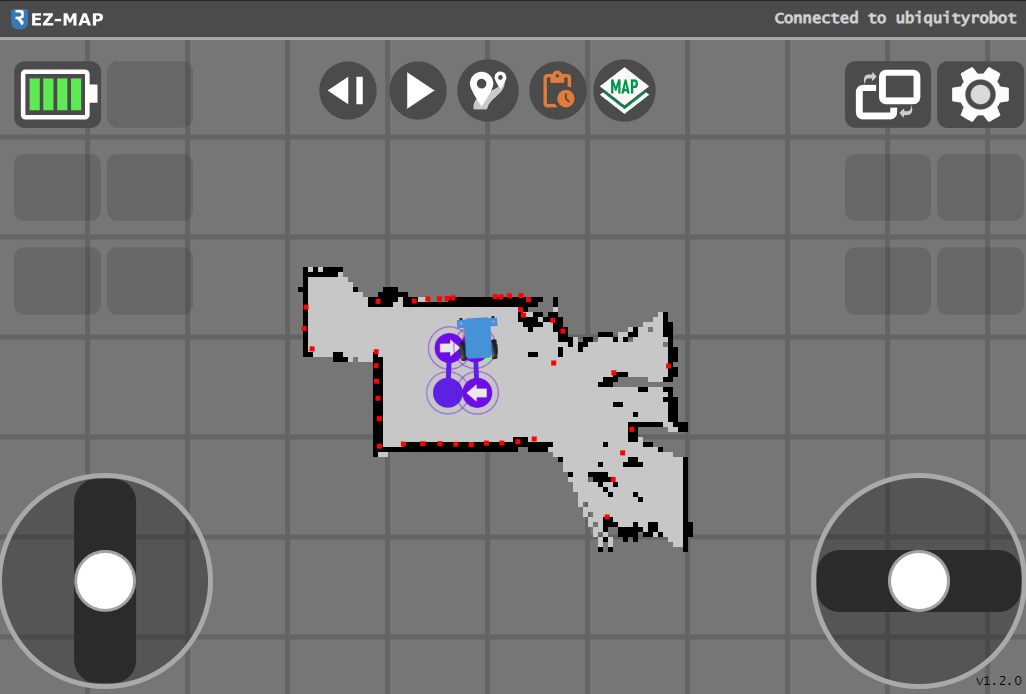
The two views included by default are the video streaming screen (by ezpkg_video_screen) and the mapping view (by ezpkg_map_screen).
The way to add your own view is to override one of the screen html files by placing an overriding one in public/views/landscape/ and public/views/portrait/. These are replacing the existing dummy declarations in the ezpkg_views package.
<includehtml src="views/landscape/screen_map.html"/>
<includehtml src="views/landscape/screen_video.html"/>
<includehtml src="views/landscape/screen_0.html"/>
<includehtml src="views/landscape/screen_1.html"/>
<includehtml src="views/landscape/screen_2.html"/>
<includehtml src="views/landscape/screen_3.html"/>
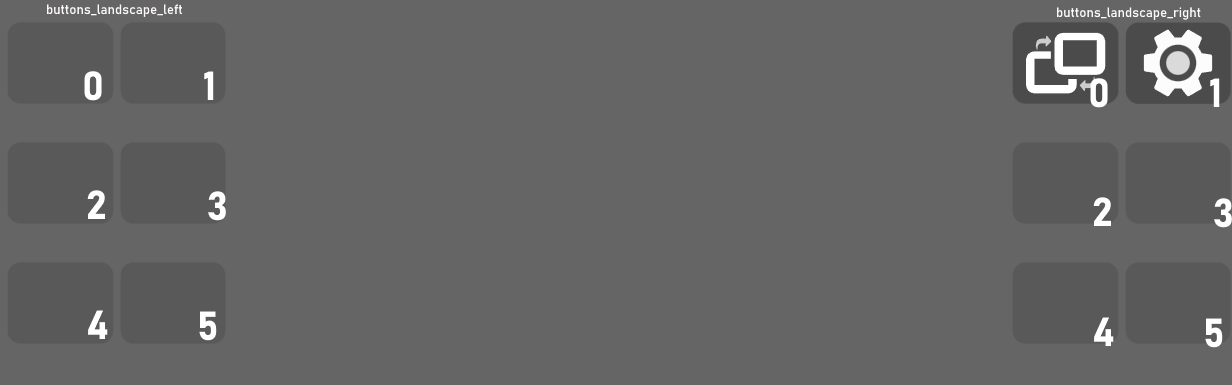
Buttons
Any of the empty slots can be occupied by additional buttons, with custom functionality when clicked.
The following buttons are included by default:
 Battery (
ezpkg_battery_widget) Calibrations (
ezpkg_calibration_widget) Telemetry Record (
ezpkg_rosbag_widget) Photo (
ezpkg_photo_widget)
Much like the views, the buttons need to replace the html files in ezpkg_views:
public/views/buttons_landscape_leftpublic/views/buttons_landscape_rightpublic/views/buttons_portrait
Landscape buttons are split into left and right and occupy a fixed position from 0-5, while the portrait buttons will be listed from left to right in increasing order.
Modal windows
Typically when a button is pressed, a popup window will open with additional content:
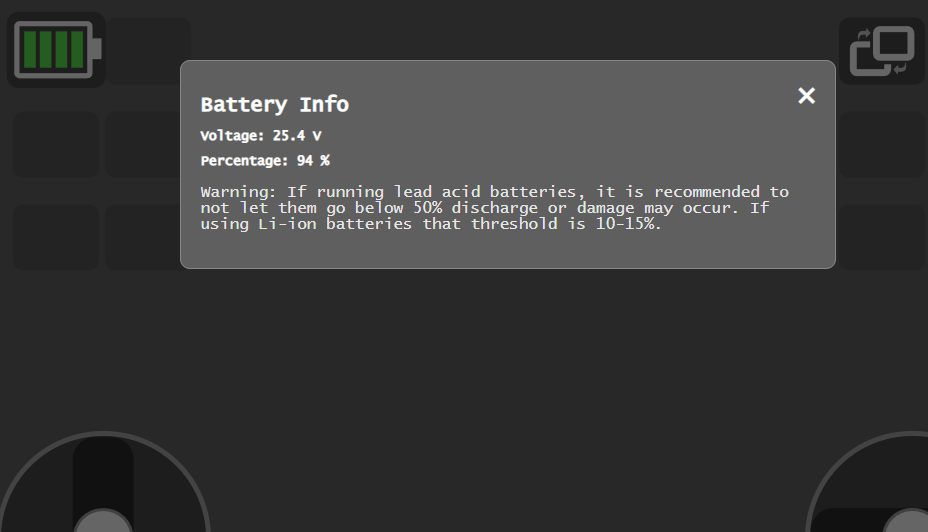
As previously mentioned the modal declerations need to replace the html files in public/html_modal/ in ezmap_web.